Install CentOS on Virtual Box, Part 2: Configuring Hard Disk [How To]
Part One is here.
Once the language and keyboard are selected, CentOS examines the hard drive. In my case, the hard drive was empty unallocated virtual space:
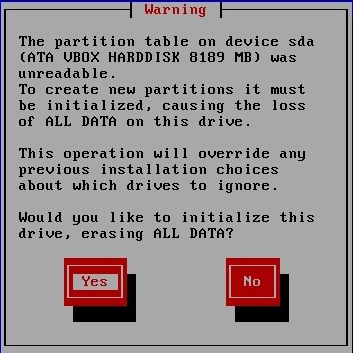
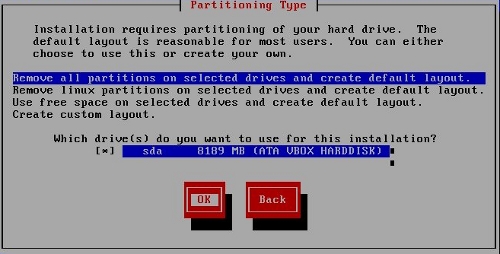
Next it displayed a confirmation dialog. Had I had more than one partition, as I might have if installing to a real machine, as opposed to a virtual one, it would have allowed me to select which partition to blow away. In this case, only one selection was possible:
This was followed by yet another confirmation dialog giving me one last chance to back out. After that, CentOS offered me a chance to review and modify the partitioning layout. I selected “yes,” not because I intended to modify anything, but so I could have this screen shot:
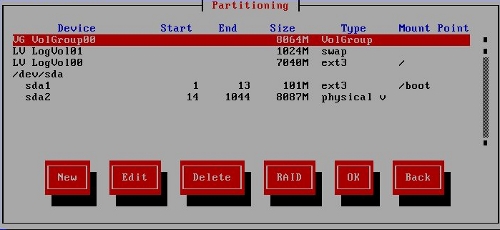
CentOS and Fedora use a Logical Volume Management (LVM) scheme for partitioning. The top three lines identify the logical volumes. No, I don’t understand it, but it works; there’s plain-language explanation, along with some cautions, here.
The bottom three lines use more conventional notation. The hard disk is /dev/sda (“SATA/SCSI Diak A”); it will be divided into two partitions: a small boot partition (/dev/sda1 or “SATA/SCSI disk A, partition 1”) and a much larger partition for the OS and installed software (/dev/sda2 or “SATA/SCSI disk A, partition 2”). In addition, there is a swap partition, shows in the upper part of the partition dialog (generally, Linux does not use a swap or paging file, but, rather, segregates swapping to a separate partition).
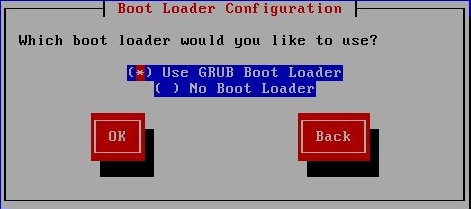
Next. CentOS asked what boot loader I wished to use. I accepted the defaults; had I been settiing up a dual boot system and already had a boot loader installed, I would have had to do something differently.
Next, it gave me the opportunity to enter special options that the boot loader could pass to the kernel on startup. This is rarely necessary. I’ve only had to do it once, when booting a Live CD which did not recognize my monitor (it was a very old monitor); I had to pass options to tell the kernel the display size and refresh rate. (For anyone unfamiliar with the term, Live CDs boot from the CD/DVD drive to RAM and do not touch the hard drive; they are handy for fixing stuff and, in the case of broken systems, data recovery.)
Following that, it gave me a chance to password protect the boot loader, so that only someone with the password could boot the computer. I can see doing this in extremely high security environments, but not in a virtual machine inside another computer . . . . .
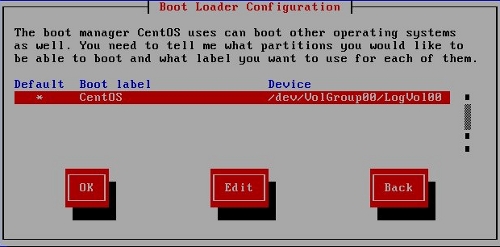
After that, it asked me if I had other partitions to add to the boot loader. If I had other partitions on the computer, they would have shown in this dialog:
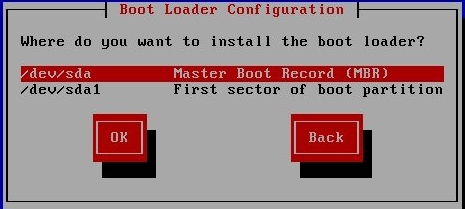
And, finally, CentOS asked me where to install the boot loader, to the MBR or to a partition. I commonly select the MBR.
And, with that, the dialogs referring the hard disk configuration are completed.
Next: Finishing the Installation.

