Installing Slackware Linux, Part 3: Target Drives
Yesterday, we looked at using cfdisk to partition the hard drive (this morning, I changed to the title of that post to make it more accurate).
Today we will look at formatting drives and selecting the target drive for the installation.
We left off yesterday by exiting cfdisk and returning to the command line. To enter the installation program, type “setup” at the command line and press enter.
The Slackware setup dialog appears:
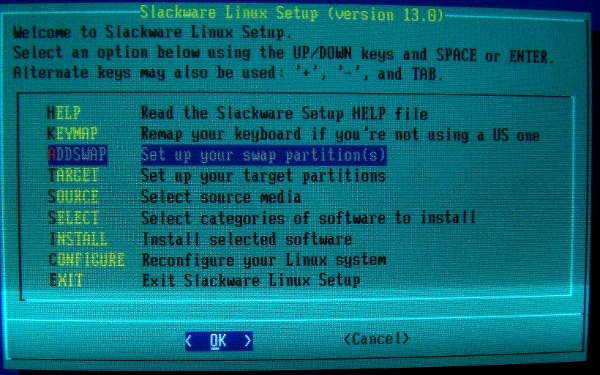
The items are
- Help: View the help file–a plain text file that you can also read in any text editor before booting into the installation process.
- Keymap: Select a keyboard layout (we did that on bootup, but can change it here).
- Addswap: Select and format the swap partition. (See the Note on Formatting at the end of the post.)
- Target: Select and format the installation partition. (See the Note on Formatting at the end of the post.)
- Source: Select the source for the installation (CD, DVD, network drive, etc.)
- Select: Choose software packages to install.
- Install: Install the operating system and software.
- Configure: Configure the bootloader, the network, optional startup processes, and so on.
- Exit: Exit setup and prepare to boot.
Today we will move start with Addswap and move through Source.
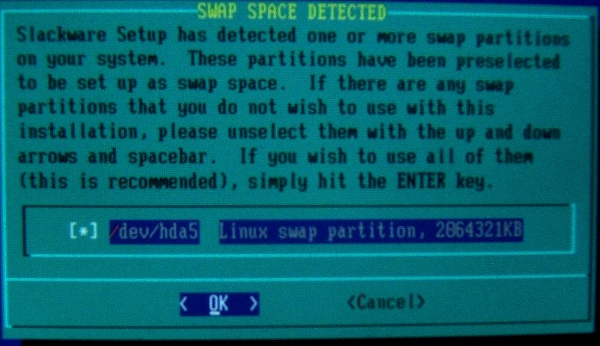
Select Addswap and press enter. The computer will prompt you to select the swap partition. If, as is usually the case, there is only one partition with the type, “Swap,” it will point to that partition by default:
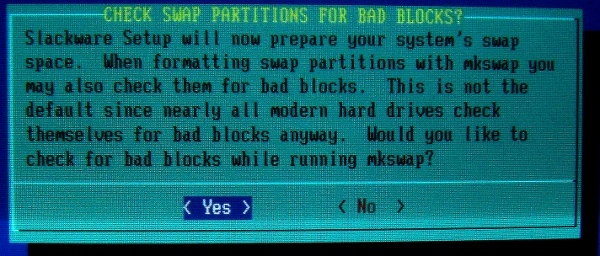
With the desired partition selected, press OK. Setup will then ask you whether you wish to check the drive for bad blocks while it’s being formatted. I usually do, on the theory that it can’t hurt and it might help (“mkswap” referred to in the picture below is the little program that formats–makes–a swap partition:
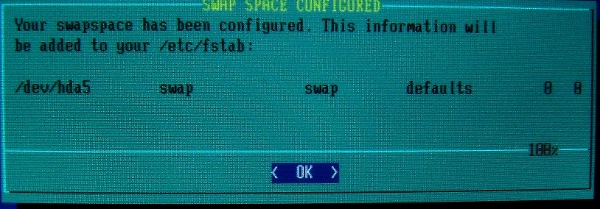
Once the drive is formatted, setup adds it to the fstab (file system table–a text file that manages your drive configuration):
Setup will then take you seamlessly into the “Target” routine, asking you to select the partition to receive the operating system and software (see the Note on Linux Drive Names at the end of this post):
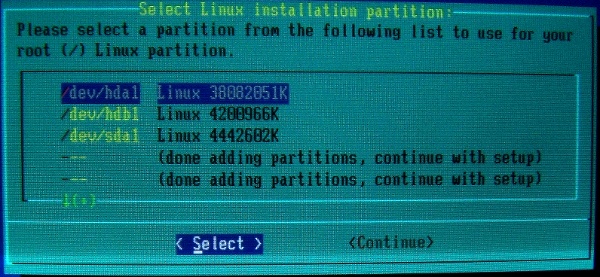
This computer happens to have three hard drives formatted for Linux. I wanted Slackware on the first one, so, when this screen appeared with hda1 selected, I used the arrow key to highlight “Continue” and pressed enter.
The next screen asks you about formatting the partition. Since it is a new, unformatted partition, it must be formatted:
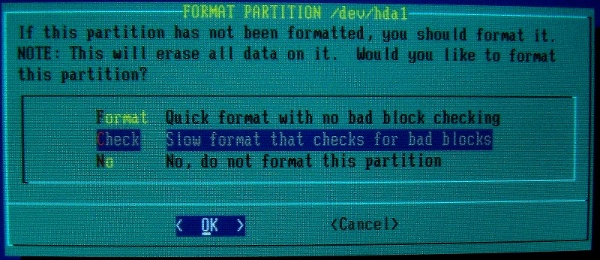
Setup then asks what file system to install. I normally accept the default which, in this case, is ext4 (it used to be ReiserFS, but, since Hans Reiser is no longer able to support that file system, that is no longer the default, but it still has its fans). (Read more about journaling file systems here.)

During formatting, setup displays a message that the drive is being formatted. After the drive is formatted and if additional drives are available, setup gives you a chance to format them.
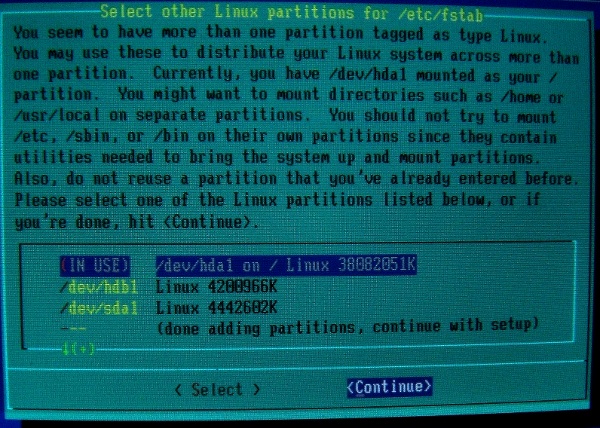
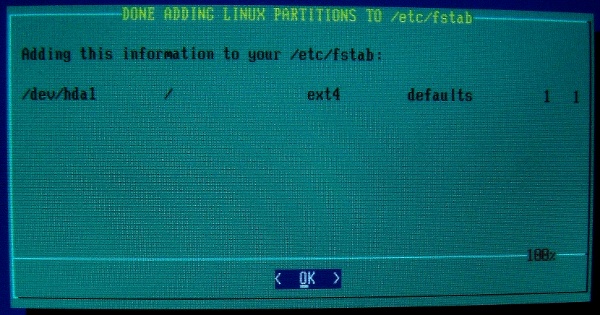
I decided not to, since they contained backup data, so I selected Continue, and setup informed me that the drive had been added to my fstab:
Setup then moves into the “Source” routine, asking you to point to the location of the installation files:
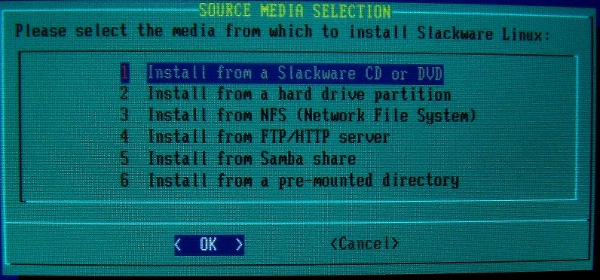
Select the desired source and press OK. For most of us, that will be a CD or DVD. Setup then asks whether it should scan for the source. I have always selected the default choice, which is to let Slackware find the installation media, and not had a problem:
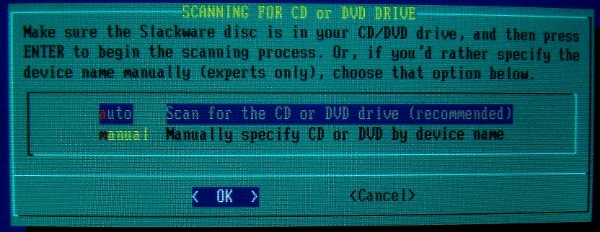
Once setup finds the source media, it will display a confirmation message and move into the Select routine.
This post is long enough. We will pick up there tomorrow.
Note on Formatting:
As I mentioned in the first post in this series, most Linux distributions I have tested offer to partition and format the drive for you, allowing you to do it manually if you wish. That automatic process would take us through “Target” in this menu.
Note on Linux Drive Names:
Geeky Windows users will know that the first hard drive in a Windows system is Drive 0. If there is more than one, the second one is Drive 1, and so on. When a Windows drive is partitioned, it’s identified by a letter: the primary drive is C:\; the next one is D:\; and so on.
In Linux, the first physical drive is drive a. If it is an IDE drive, it is hda (hard drive a); if it’s a SCSI or SATA drive, it is sda (SCSI drive a). The next one will be hdb (or sdb). The first partition on hda will be hda1 (hard drive a, partition 1), etc.

