Installing Slackware Linux, Part 5: Finishing Up
This is the fifth of series of posts on installing Slackware Linux. The previous parts:
Part 1: Considered why some persons find Slackware difficult to install.
Part 2: Partitioned the hard drive for a clean install, as opposed to an upgrade or a dual boot installation.
Part 3: Formatted the swap drive and target drive and pointed the computer to the source media.
Part 4: Installed the operating system and included software and configured LiLo (the Linux Loader).
This post looks at the final steps of configuring the system.
After LiLo is installed, setup asks what type of mouse you have:
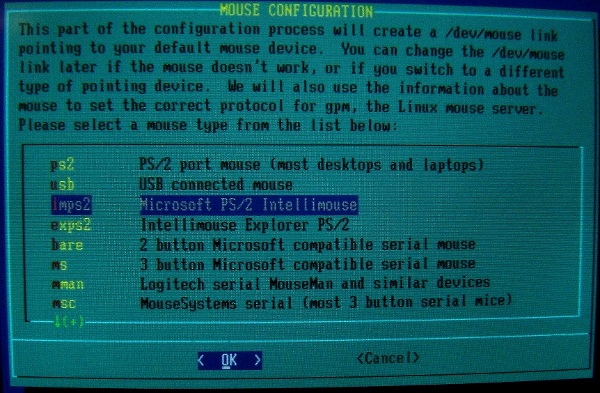
I have always accepted the default selection. In earlier versions, Slackware was not adept at detecting three-button mice, but that could be easily fixed by changing the configuration file for X a later time. In version 13.0, the current release, my three-button mouse was detected perfectly.
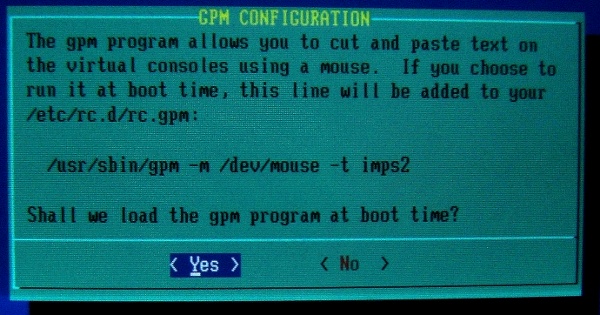
Next it asks if you want to run GPM (General Purpose Mouse) at startup. I have always accepted the default “Yes,” though, truthfully, I haven’t taken advantage of the function very often:
Setup now asks whether you want to configure your network. Unless the computer is going to be a stand-alone box not connected to either an internal network or the internet (or both), it’s best to answer yes. In fact, it’s best to answer yes even if you do not expect to connect it to a network, so it’s network-ready if you decide to connect it later.
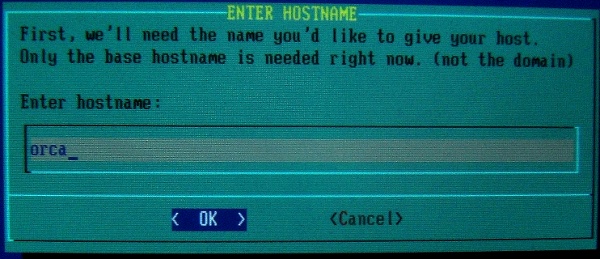
Once you answer yes, the first screen prompts for a computer (“host”) name. (For some reason, I decided some years ago to name all my computers after sea creatures.) Enter the computer name and hit enter (you can always change this or any of the following network settings later by editing the file, /etc/rc.d/rc.inet1.conf, with any text editor):
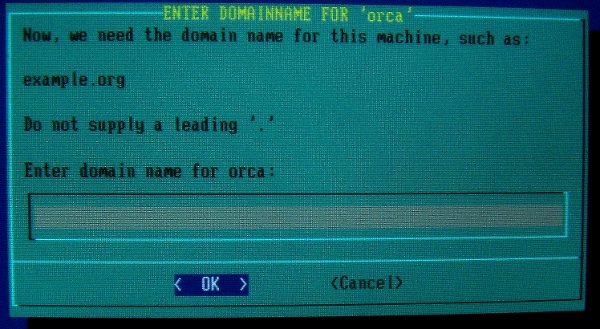
Setup now asks for a domain name. This domain name has nothing to do with “domain logins” and nothing to do with anything on the other side of your internet connection; it applies only internally; it is strictly a label. I always keep it simple with “bell.org,” though, given my choices of computer names, maybe I should change it to “seaworld.”
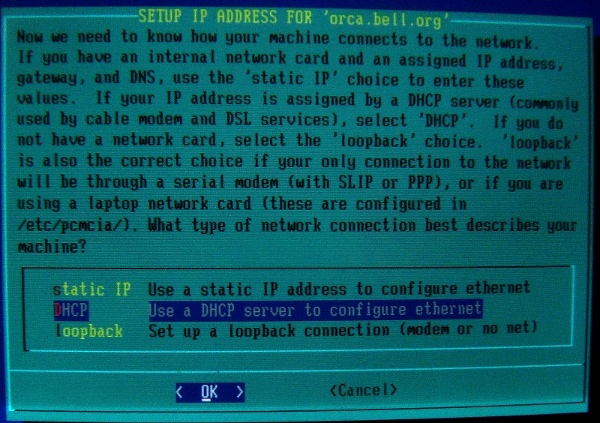
Next, setup asks whether the computer will have a static IP address, a DHCP address, or just the loopback address. If you select “Static,” it will prompt you to enter an IP address, then a gateway address. In either case, the standard loopback address of 127.0.0.1 will be assigned in the /etc/hosts file.
I selected DHCP.
It will then ask you to set the DHCP host name. This is an optional setting required by some ISPs. I have never had to enter anything on this screen; check with your ISP to see whether you need to.
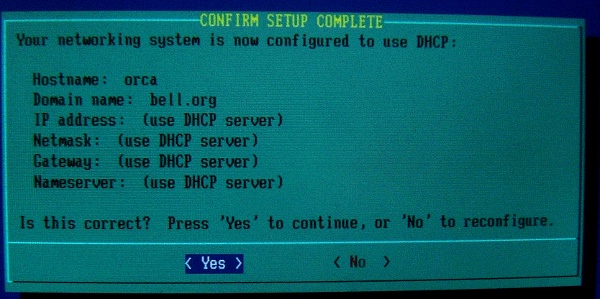
Most persons can just hit enter to move to the next screen, which displays a summary of the settings and gives you a chance to fix them if you hit the wrong key somewhere along the line:
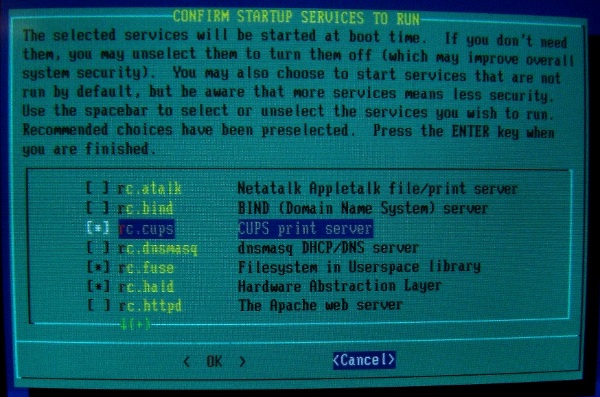
Setup now asks what services you wish to run at startup. I recommend accepting the defaults and at least these two (choices made here can be changed later):
- If you intend to print from the machine, either directly or over a network, start CUPS.
- It you intend to share files or folders, start Samba. (In a strictly Linux network, there are other ways of sharing folders, but Samba enables sharing among Linux computers and among Windows and Linux computers, so it’s the best choice for starters.)
Cursor to the item you wish to change and press the space bar to toggle the setting.
Setup will now ask whether you wish to try some custom screen fonts for the console (command line) window (screen not shown). The default choice is “No.”
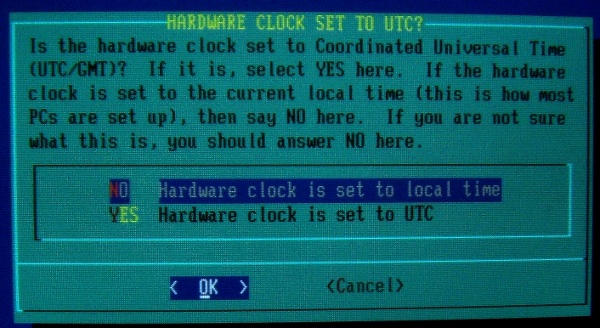
I consider this one of those “what’s the point?” items and hit enter to go to the next screen, which asks whether you wish to use local time or UTC (Greenwich Mean Time) or local time. I usually select local.
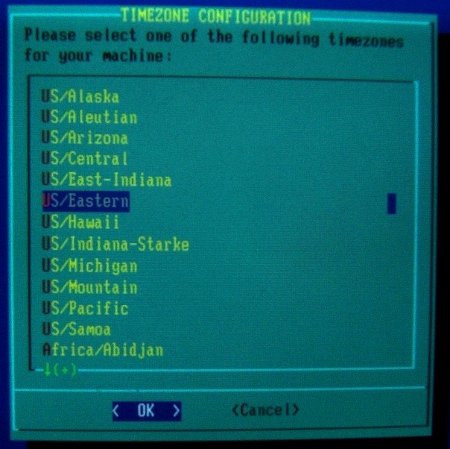
If local is selected, setup will ask for the time zone:
Setup next asks you to select a default window manager or desktop environment. Any selection made here may be changed during normal use by running a program called xwmconfig (X window manager configuration), which display a menu similar to the shown below:
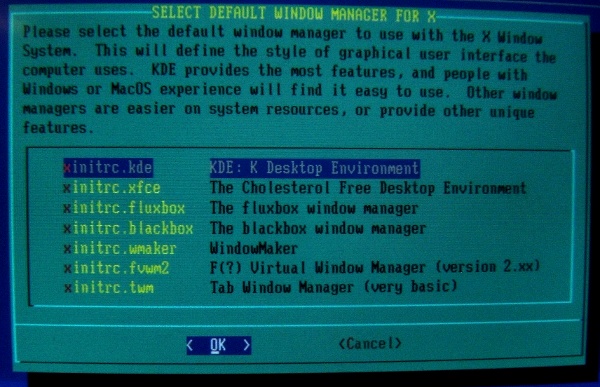
The default selection is KDE, which is probably the best choice for someone coming to Linux from a purely GUI environment, such as Windows, because it offers many graphical setup and configuration tools.
The current KDE release, v. 4.x, though, requires a lot of computing power. On my PIII 1000 MHz 256 MB RAM test machine, v. 4.x is significantly slower–painfully slower–than was v. 3.x.
A good second choice would be XFCE, which uses many of the KDE features and graphical configuration dialogs, but is much lighter weight. My personal favorite is Fluxbox, but configuring it, while not difficult, requires more editing of text files and less clicking of buttons.
Setup’s last task is to prompt you to set a “root” password (“root” is the administrator user). After you enter and confirm the password, you’re done and ready to reboot the machine:
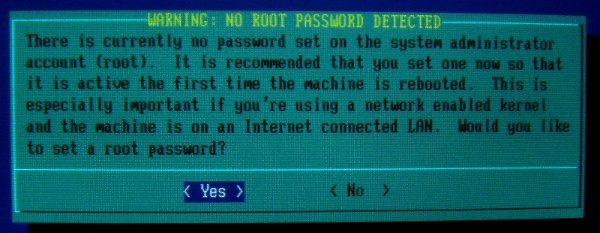
It is unwise not to set a root password. Upon reboot you can create a user for day-to-day computing.
You’re done. Setup will prompt you to reboot the computer with Alt-Ctl-Del. You can also reboot it by typing “reboot” on the command line and hitting enter.
Next: Pointers for making your Slackware experience easier and more fun.


