Virtual Box: Creating a Virtual Machine
Virtual Box is, to quote the Virtual Box website,
. . . a powerful x86 and AMD64/Intel64 virtualization product for enterprise as well as home use. Not only is VirtualBox an extremely feature rich, high performance product for enterprise customers, it is also the only professional solution that is freely available as Open Source Software under the terms of the GNU General Public License (GPL). See “About VirtualBox” for an introduction.
Virtual Box was created by Sun Microsystems and was acquired by Oracle when it bought Sun.
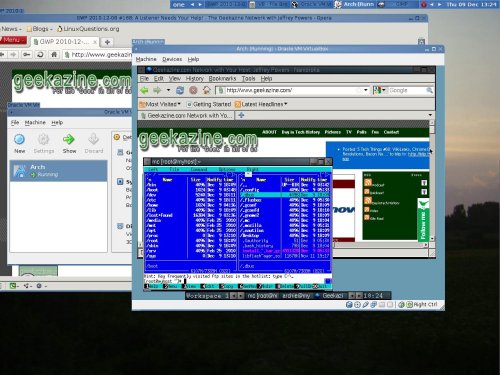
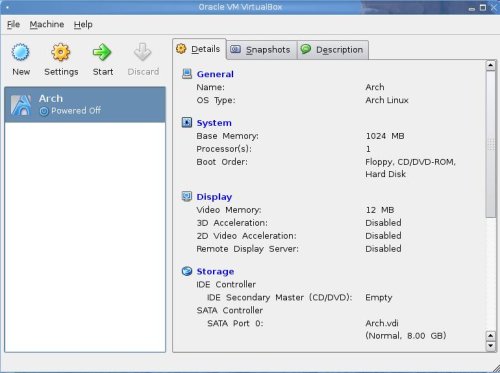
Here is Arch Linux running in a virtual machine (VM). Behind it and to the left, you can see Virtual Box and, behind that, the incidence of Opera I’m typing in right now.
I have been mucking with Virtual Box for some time and have finally figured it out.
I think.
I had it working last week with one problem: I could not establish a consistent internet connection for the virtual machine. In fact, in working on that, I ended up blowing up my entire installation and having to rebuild the computer.
So I tried again, but this time I downloaded the current release (v. 3.2.12) from the Virtual Box site. (Debian Linux, which I’m running right now, values being stable above being bleeding edge, so it is often the case that that the software packages in the Debian repositories are not the most recent.) It installed smoothly and, unlike the earlier versions I had been working with, contained all the elements in one package (in earlier versions, several different packages were necessary).
I then created a virtual machine; it worked the first time and included the internet connection with an effortless one-click setting.
I also installed Virtual Box on my Windows box and verified that the interface looks the same on both Windows and Linux. (Microsoft, though, really doesn’t seem to like Virtual Box–during the install, Windows threw about six warnings telling me to stop installing it because it might threaten the stability of the “current operating system.” So far, it hasn’t, but I don’t intend to use it there.*
The rest of this post will summarize the steps of creating a virtual machine. Next will be a series on installing Arch Linux.
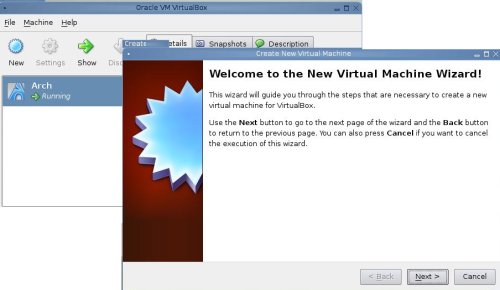
To configure a new VM, click “New” in the Virtual Box window to start the process:
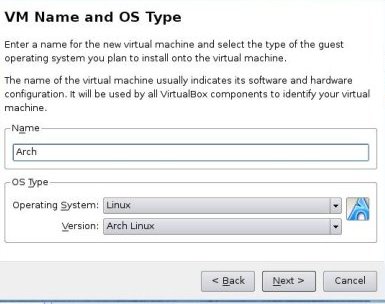
The next Window prompts you to name the VM and select the type of operating system. The choices are:
- Windows
- Linux
- BSD
- MacOS
- Solaris
- IBM OS/2
- Other
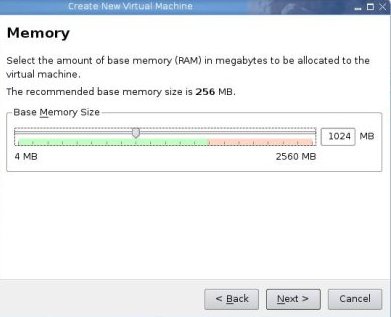
In the next screen, use the slider or the text box to allocate memory to the VM. This memory will not be available to your normal OS while the VM is running.
The next screen prompts you to create or select a hard disk. Note that this is a virtual hard disk, space reserved for the virtual machine. Selecting to use an existing one means selecting an existing virtual hard disk. Once you make the selection, a hard disk configuration dialog begins; the first step is to choose between a fixed or a dynamic hard disk:
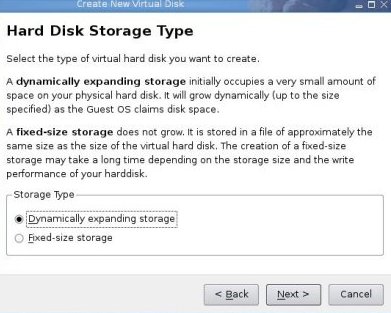
- “Fixed” sets aside a fixed amount of space.
- “Dynamic” allocates space as needed up to the maximun set in the next dialog.
After that, a screen with a slider similar to the memory allocation screen shown above allows you to choose the size of the hard disk. I allowed 10 GB for Arch, more than the default recommendation, but the actual size on my hard drive after a bare-bones installation is slightly less than 1 1/2 GB.
Virtual Box will display a summary of your choices, with the option to go back to change something or to create the disk now. Clicking “Finish” creates the VM.
You have an empty drive ready to accept an installation.
________________________
*The Linux geek in me chuckles at the use of “Windows” and “stability” in the same sentence, but that’s neither here nor there.

