Creating my First Adobe Character Animator Puppet from Scratch
I’ve been playing with Character Animator on and off for the last couple years. It’s a fun program, but it also takes a little bit of commitment if you want to use it for any video. Nonetheless, one of my goals during this quarantine period is to build up skills like that.
So it’s time to delve in and create my first puppet for Character Animator. From scratch.
That means I’ll be creating the layers, groups, and more. I have read and seen a lot of the tutorials, and is all about putting a layered graphic together. Not a big deal, right?
What is Character Animator?
This is a program in the suite of products you get with Adobe Creative Cloud. Character Animator can simply create a animated puppet to use in video. The Simpsons uses Character Animator to create their shows, for example.
Best part is, it uses programs you already know how to use if you’re in the Adobe family.
You can get Creative Cloud here. $52/month, or $598. year.
The computer I used during this build day is the HP ZBook Core 15 inch i9. Get the ZBook here.
Photoshop or Adobe Illustrator
I suppose any program that can create a layered graphic could be used, as long as they can be saved in .PSD or .AI format. You can also make a single layer image, and use Character Animator to warp and adjust. That would mean no eye or mouth movements, unless you’re building from the program itself.
I chose Photoshop, because I have a better understanding of the program. I can still create vectors in my layers and groups. What’s even cooler is I can create Smart Objects with layers (like the torso, legs, and face) that don’t need to move independently. By editing a smart object, it moves all other layers out of the way, and lets me focus.
Taking an old school approach
Years ago, one of my first web ventures was creating an online comic. I am familiar with the old-school way of drawing a character: Outline, draw, ink. I used some of these techniques in building my puppet so I can draw the puppet faster and easier.
Once I drew out my blue-line sketch, I started on the head.
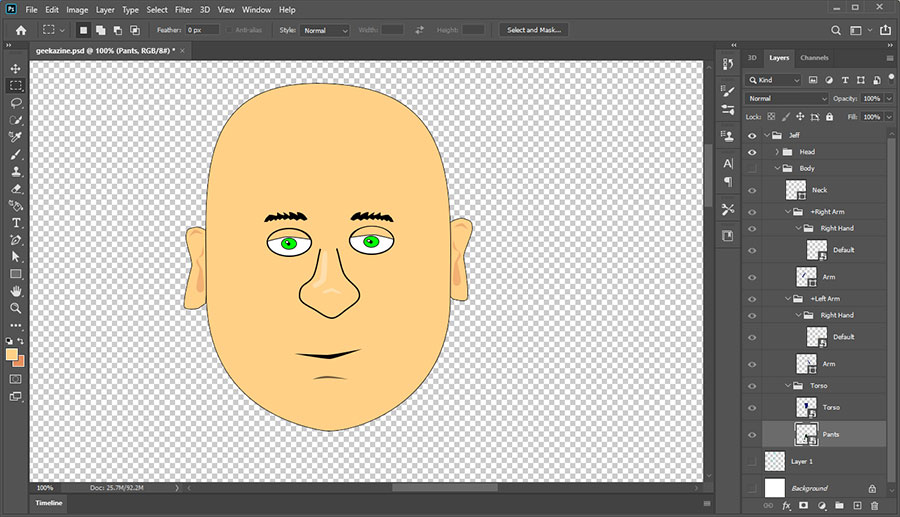
Building the Head
This is the easiest part of the build, because if you set it up correct, the program will take over and do what you want it do. For example, if you make a layer for the eyeball, then the pupil, animator will move it around the eyeball when you import it.
This is because it uses it’s own identification commands in the plus (+) symbol. If you create a group called “+Left Eyeball” (the + being the identifier), then the program will know that anything inside that group will move freely.
They call it “Warp Independently”. If the layers are set up correctly inside the “+Left Eyeball”, you will be able to blink, move the pupil around, and more (depending on if you have the camera mapping turned on).
The head can have the eyes, mouth, nose, ears, eyebrows, and hair move when you move your head around. If you end here, you can create some simple and easy videos with just a floating head.
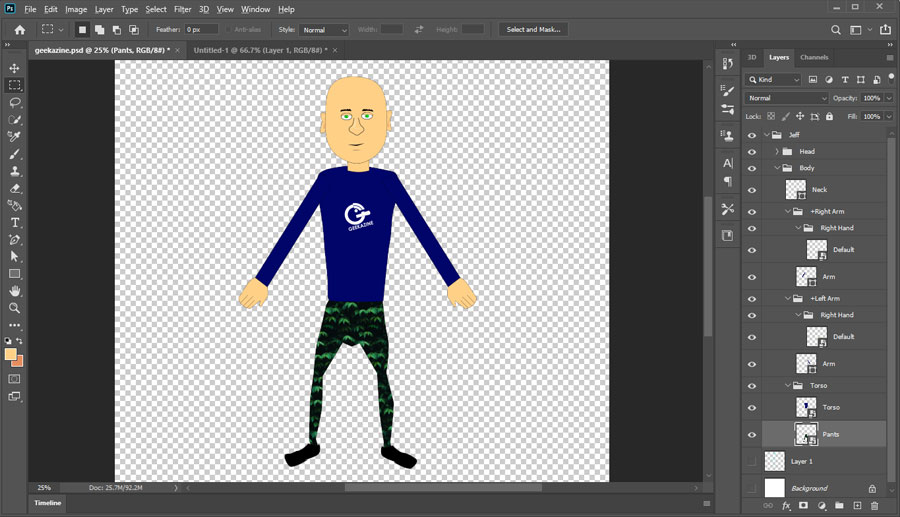
Building the Body
Once again, you can have a single sprite, or a complex set of groups, layers, and smart objects for the body. You can program arms, legs, and more to move however you set it up.
The only issue is a single-image could warp, and not look as good as you might want it to. having the arms as their own layers helps with that.
And if you want to change the look of a hand (from an open hand to a point, thumbs up, fist, or more), the you will definitely need layers to allow for switches
I did set up a grouped area with torso, legs, arms, and hands. All of these items


